This page was created to accompany an article published on the RPS AV group magazine AV News – Winter 2025 – Issue 236 (page 51). On this page I am summarising the different methods I use that provide interactions with the photographs.
Slider comparisons:
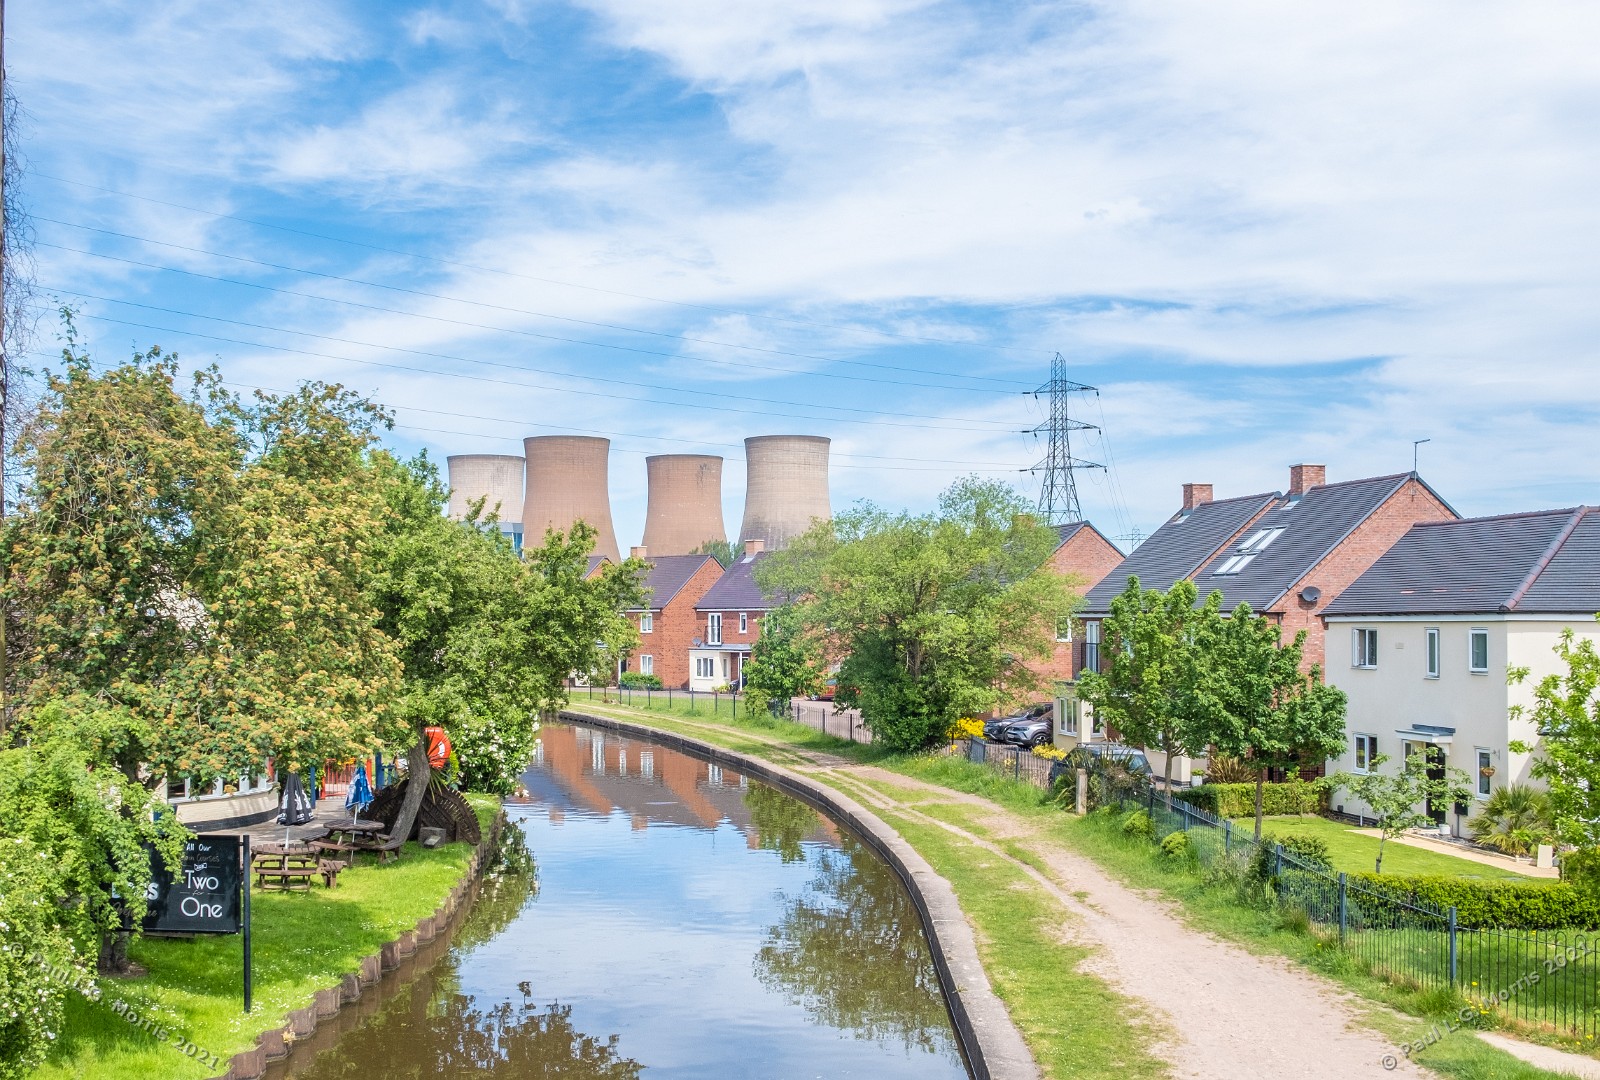
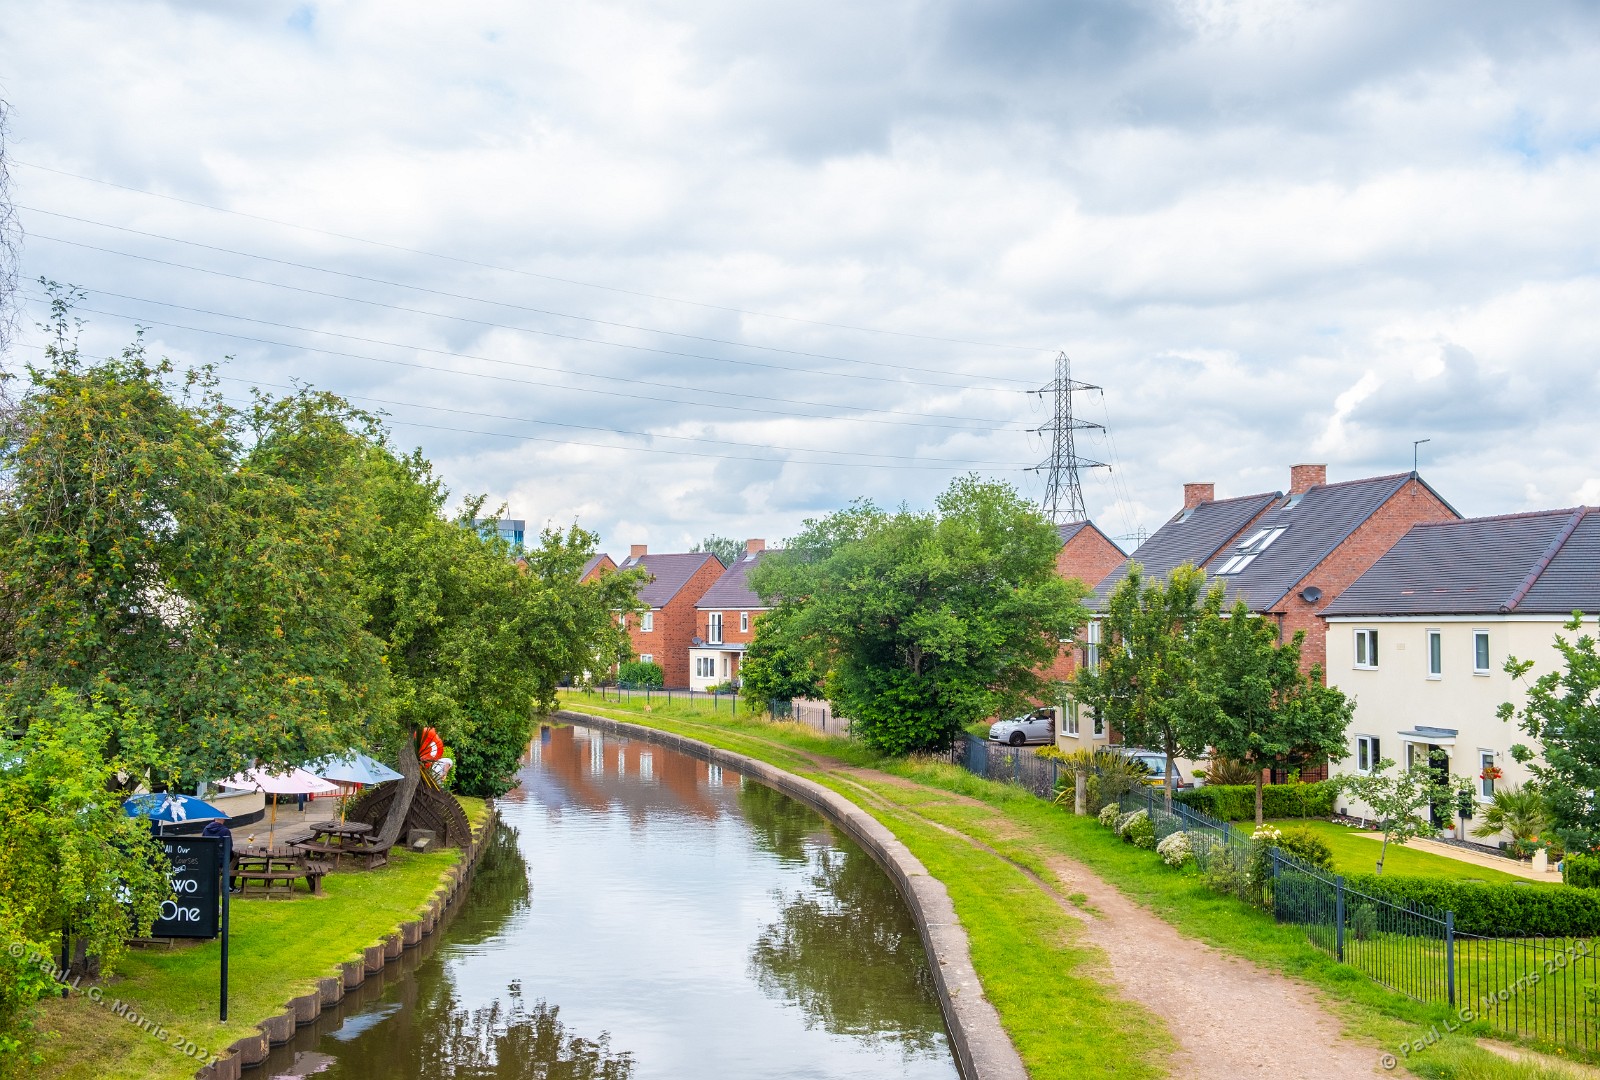
These provide Before/After or Then-And-Now side-by-side comparisons. Drag the white line from side to side. This example shows a ‘Before & After’ of the cooling towers at Rugeley Power Station in Staffordshire that were demolished in the spring of 2021.
(Example 1)
But the real value of this is for ‘Then and Now’ type of comparisons is making use of very old views and creating modern versions. For this I have several old travel guides that I use when I am visiting different parts of the country. Because of their age I believe the photos are out of copyright. This is a view of Stokesay Castle (near Craven Arms in Shropshire):


(Example 2)
Even with a copy of the old view in my hand I wasn’t quite in the right place – the comparison slider is good at revealing deficiencies. Therefore I need to visit again using another right of way further to the right – Ordnance Survey maps are invaluable for this sort of photography!
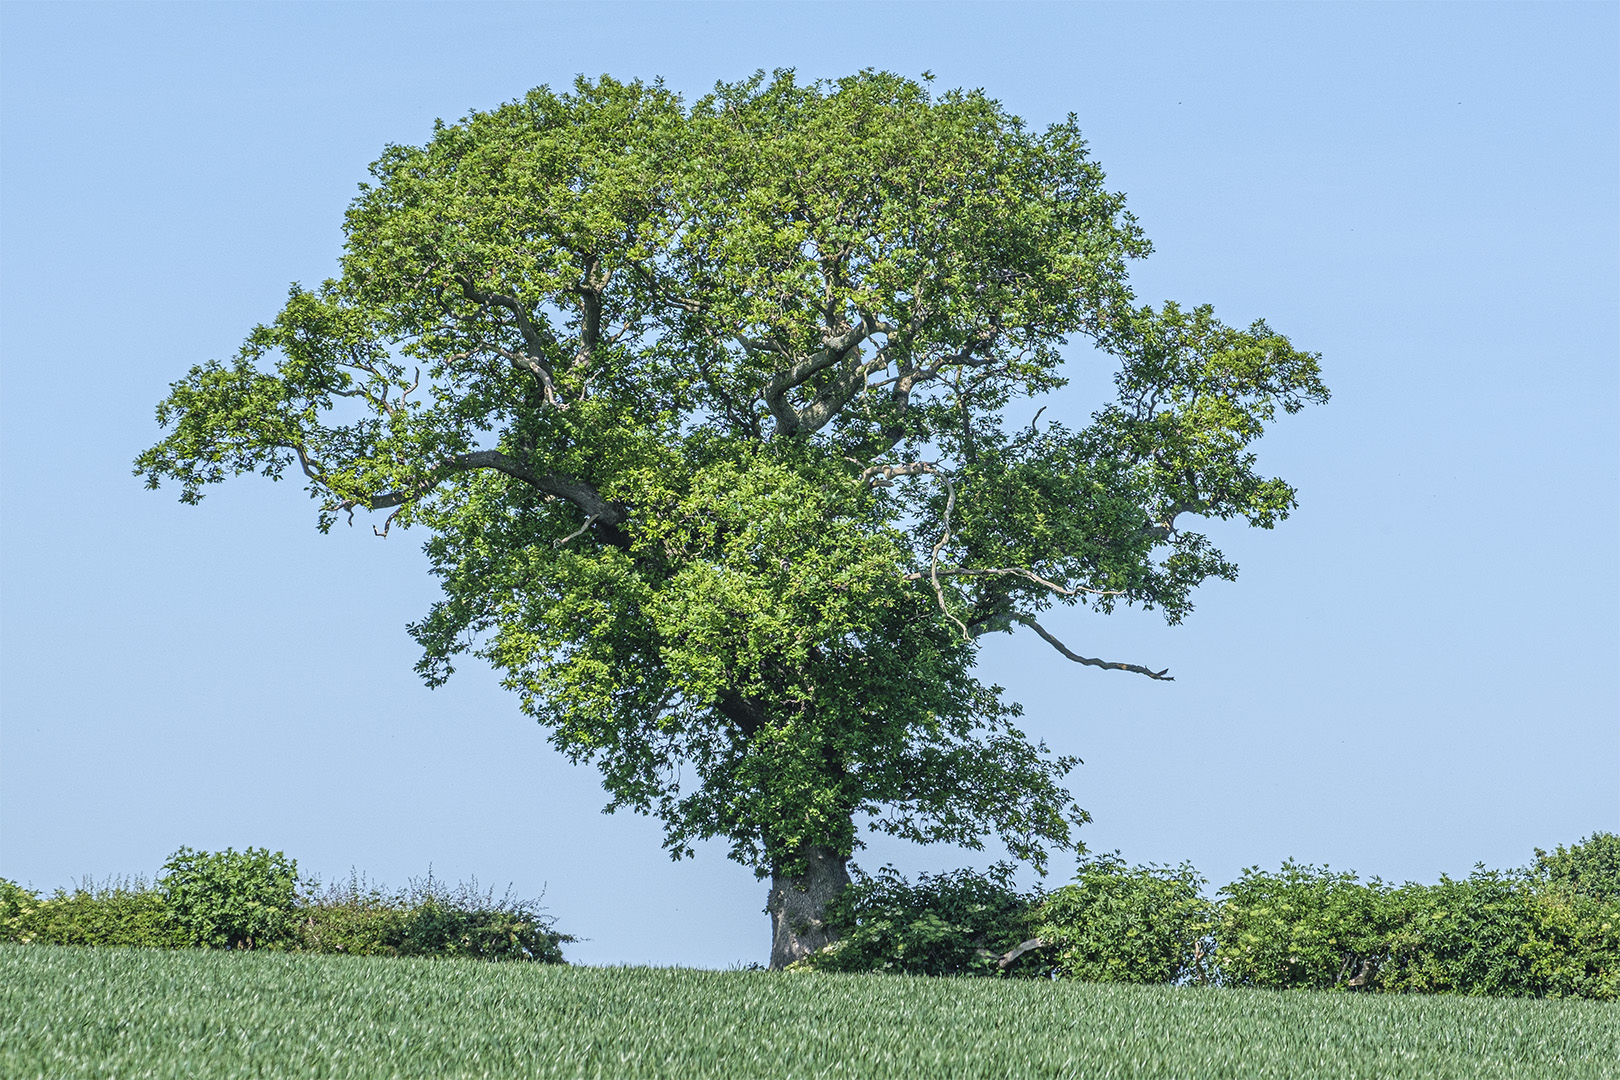
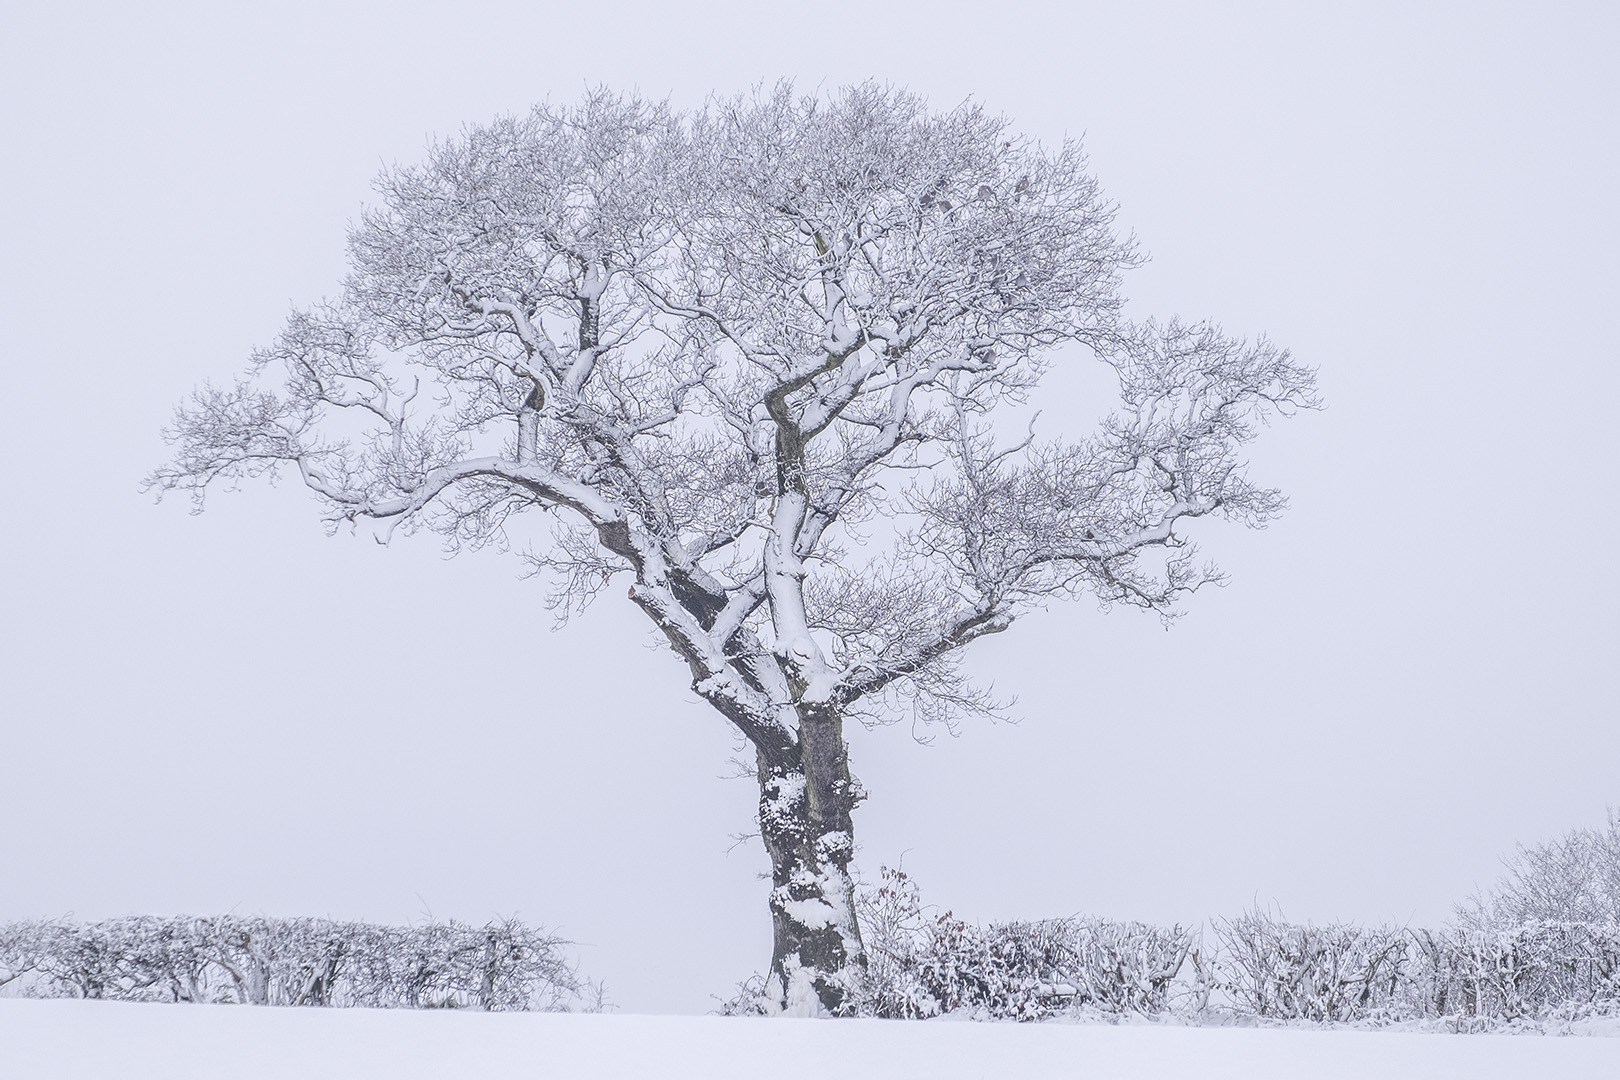
This next example uses 2 images taken from a sequence photographed over a period of nearly a year. It shows a tree at the height of summer in full leaf, comparing it to its winter state after a few inches of snow:
(Example 3)
Virtual Tour Through Time using Virtual Tour Software
Using Virtual Tour Software with a full set of images taken over a period of time I produce an interactive ‘time-lapse’.
Below I show two options with a sequence of photos of a tree taken over the course of about 10 months. The first shows the virtual tour option, the second shows the video option. A couple of advantages of the virtual tour method is the interactivity and the ability to zoom in to see the detail:
(Example 4)
Go to the 10th image of the above tour and zoom in to see the pigeons sheltering in the snow – you should be able to see this:

Play with the controls at the bottom to hide/reveal the thumbnails, zoom in and out, and more…
I have also processed the same images into a short video – the YouTube copy can be seen here .

(Example 5 on YouTube)
Yes, the YouTube version has a soundtrack but you can add sounds to the virtual tour as well.
Panoramic views:
This indoor view of a conservatory (below) is a single full sphere (360º x 180º) panorama that was taken with a basic ‘sphere’ camera that takes the full panorama in one go. This means you can view up and down as well as side to side – just drag with your mouse or finger in any direction.
(Example 6)
The setting is for the panorama to start panning automatically. But you can stop, start manually pan, zoom in and zoom out.
This next view of houseplants is based on a single full 360º panorama taken with a compact camera on a home-made panorama mount. The image was stitched from 14 separate photos:
(Example 7)
Note the right hand icon of the control panel at the bottom middle of the screen image. It sets the viewing to full screen mode which was used for these 2 screen shots. This enables a decent level of detail by zooming in:
Virtual Tours
So far I have shown the use of virtual tour software for anything but a tour. For this segment I will show an example of using virtual tour software for virtual tours. But this example will be via links to Staffordshire Wildlife Trusts ‘Trent Valley’ website. But first an little explanation of the entry screen of one of the tours, ‘Branston Leas’:
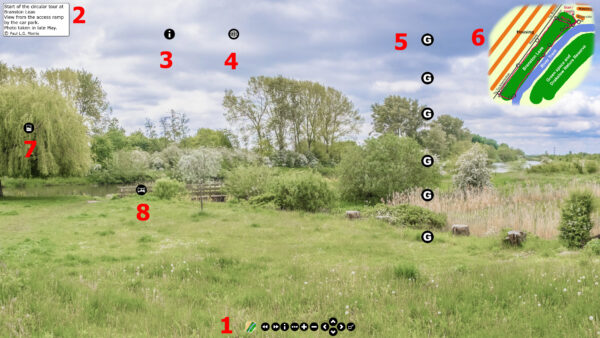
(Example 8)
This introductory screen has a lot on it so let’s go through it one item at a time:
1. At the bottom is the control panel controlling the route through the tour. The bottom one on the left switches the map (6) on or off
2. An information box specific to each page. The ‘i’ button in (1) switches this on or off
3. An object specific information box is revealed. There can be several on a page
4. A web link. This can be associated with an object
5. This is a set of photo galleries created with the virtual tour software. On this tour images from other volunteer photographers are included
6. The map of the location. The route is a red line. Along the line are some small black circles. Click on one of these and you jump to that spot
7. This is a ‘hotspot’ for another photo – click on it to view
8. This is a hotspot for the next view on the walk
There is a lot more sophistication available. For example, not only can you have sound specific to a page but, as you rotate a panoramic view around the sound of an object can get louder as it comes into view then fade as it moves out. Also, keep an eye out for the little black circles on the map. This article is only scratching the surface of the capabilities.
This link will take you to the Branston Leas tour in a new tab. Have a play with the controls. Pan around the views and try zooming in. Some of the panoramas are full sphere so you can move up and down as well as all the way round.
A ‘Single Space’ virtual tour
A virtual tour doesn’t have to be a tour, it can be a single space. Below is a virtual tour of our small conservatory showing the following images:
- A full ‘sphere’ 360×180 ° panorama taken with a budget 360 camera
- A simple photo showing the setup
- A full 360° panorama taken with the same camera the following day
- Another simple photo showing the setup
- A 360° image created from 10 individual photos taken with a compact camera in a DIY ‘panohead’. These were stitched together in software
(Example 9) You can click on the display to drag the image around and zoom in with the mouse wheel.
If you have any questions or comments, please use the contact form to email me